
Snipping Tool Windows 10 is a built-in tool that helps you take screenshots easily. You can capture any part of your screen, save it, and even edit it before sharing. It is perfect for capturing important information, saving pictures, or troubleshooting issues.
Many people don’t know that Snipping Tool Windows 10 has different modes for taking screenshots. You can choose freeform, rectangular, window, or full-screen snips. It also has a delay feature, which lets you take screenshots after a few seconds. This tool makes capturing and saving images quick and simple.
Table of Contents
What is Snipping Tool Windows 10 and Why Use It?
Snipping Tool Windows 10 is a built-in screenshot tool that helps you capture images from your screen. It allows you to take a snapshot of any part of your screen, whether it’s a window, a freeform shape, or the entire display. This tool is great for saving important information, capturing images, or troubleshooting computer issues.
Using Snipping Tool Windows 10 is simple and does not require installing extra software. It provides different snipping modes, making it flexible and useful for different needs. Whether you are a student, teacher, or office worker, this tool can make your work easier by allowing quick and efficient screen captures.
Many users prefer this tool because it offers easy editing options. After taking a screenshot, you can highlight important areas, draw on the image, or add notes. It also lets you save the image in various formats like PNG, JPEG, or GIF, making it a versatile tool for daily tasks.
How to Open Snipping Tool Windows 10 in Easy Steps
Finding Snipping Tool Windows 10 is simple, and you can open it in different ways. The easiest method is using the search bar. Follow these steps to open the tool quickly:
- Click on the Start Menu or press the Windows key.
- Type Snipping Tool in the search box.
- Click on the Snipping Tool application from the results.
Another way to open it is through the Run command. Press Windows + R, type snippingtool, and hit Enter. This will launch the tool instantly. You can also pin it to the taskbar for quick access.
If you prefer keyboard shortcuts, press Windows + Shift + S. This will open the snipping options directly, allowing you to capture the screen without opening the full tool. These methods help save time and make the process smoother.
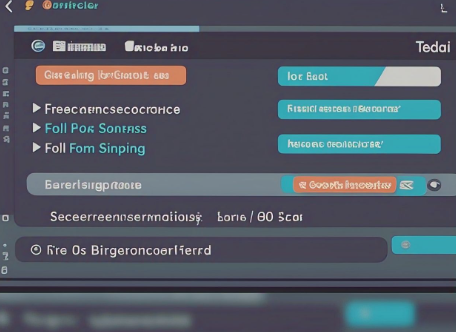
Different Screenshot Modes in Snipping Tool Windows 10
The Snipping Tool Windows 10 offers multiple screenshot modes. Each mode is useful for different situations, allowing you to capture only what you need. Below are the four available modes:
- Freeform Snip – Lets you draw any shape around the area you want to capture.
- Rectangular Snip – Captures a rectangular section of your screen.
- Window Snip – Takes a screenshot of a specific open window.
- Full-screen Snip – Captures the entire screen.
Each mode gives flexibility in taking screenshots. If you want to highlight a specific part of an image, the freeform snip is ideal. For capturing open applications, the window snip works best. Understanding these options can help you choose the right mode for different tasks.
Step-by-Step Guide to Taking a Screenshot
Taking a screenshot using Snipping Tool Windows 10 is quick and easy. Follow these simple steps to capture your screen:
- Open Snipping Tool from the Start menu or shortcut.
- Click New to start a new screenshot.
- Select the snipping mode you want to use.
- Drag the cursor over the area you want to capture.
- Release the mouse button to take the screenshot.
Once you capture the image, a preview window will open. Here, you can make edits, highlight sections, or add annotations. When done, click Save As to store the image on your computer. These steps ensure you get clear and accurate screenshots every time.
How to Edit and Save Screenshots Using Snipping Tool Windows 10
Editing your screenshots is simple with Snipping Tool Windows 10. After capturing an image, you can make changes before saving. The tool provides basic editing features like highlighting, pen tools, and erasers.
To edit, use the pen tool to draw or mark important areas. The highlighter helps emphasize text or details. If you make a mistake, the eraser can remove unwanted marks. These features make your screenshots more useful and easy to understand.
When ready, click File > Save As to store your image. Choose a file format such as PNG, JPEG, or GIF based on your needs. Saving the image in the correct format ensures it remains clear and easy to share.
Using the Delay Feature for Timed Screenshots
Sometimes, you may need to take a screenshot after a few seconds. The Delay feature in Snipping Tool Windows 10 allows this. It helps capture pop-up menus or tooltips that disappear quickly.
To use the Delay feature:
- Open Snipping Tool and click Delay.
- Choose a delay time from 1 to 5 seconds.
- Click New, then wait for the delay time to pass.
- Capture the screen as needed.
This feature is helpful when trying to screenshot time-sensitive elements. It ensures you get the perfect capture without missing important details.
Best Shortcut Keys for Snipping Tool Windows 10
Keyboard shortcuts help you use Snipping Tool Windows 10 more efficiently. Here are the most useful shortcuts:
- Windows + Shift + S – Opens the Snip & Sketch tool.
- Alt + N – Starts a new snip.
- Ctrl + S – Saves the captured image.
- Ctrl + C – Copies the screenshot to the clipboard.
Using these shortcuts can speed up your workflow and make screen capturing easier.
How to Use Snip & Sketch with Snipping Tool Windows 10
Snip & Sketch is a modern version of Snipping Tool Windows 10. It provides additional editing features and a more user-friendly interface.
Snip & Sketch Features:
- More advanced editing tools like cropping and ruler.
- Easier sharing options through email or cloud services.
- Better integration with Windows 10 for faster access.
Using Snip & Sketch along with Snipping Tool Windows 10 gives you more flexibility in capturing and editing screenshots.
Fixing Common Problems in Snipping Tool Windows 10
Sometimes, Snipping Tool Windows 10 may not work properly. Here are common issues and solutions:
Common Problems & Fixes:
- Snipping Tool won’t open – Restart your computer and try again.
- Screenshots not saving – Check your file permissions and available storage.
- Keyboard shortcuts not working – Ensure your Windows settings allow shortcuts.
Following these tips can help fix issues and keep the tool running smoothly.
Final Tips for Using Snipping Tool Windows 10 Like a Pro
Mastering Snipping Tool Windows 10 can improve productivity. Here are some final tips:
- Use shortcuts to save time.
- Try different snip modes for better results.
- Use Snip & Sketch for more editing options.
These simple tricks can make capturing screenshots faster and more effective.
Conclusion
Snipping Tool Windows 10 is a simple and helpful tool for taking screenshots. It allows you to capture any part of your screen quickly and easily. With different snipping modes, editing options, and shortcut keys, this tool makes saving and sharing images much easier. Whether you are a student, office worker, or casual user, this tool can help you complete tasks efficiently.
If you want to take better screenshots, try using features like the Delay option, Snip & Sketch, and keyboard shortcuts. These options can improve your experience and make screen capturing faster. Now that you know how to use Snipping Tool Windows 10, you can take perfect screenshots anytime!